As the seasons are changing, you may be thinking about building or improving upon an already existing greenhouse. There are so many different materials out there, and it can be hard to know where to even begin! We’re here to help as you navigate all the ways you can build your dream greenhouse.
We’re going to explore a material that you’ve probably heard of but might not know much about: polycarbonate. Some benefits include ease of installation, durability, heat retention, and light diffusion, while the main drawback is cost. Polycarbonate is easy to find at hardware stores, and their fastening systems make installation feasible for do-it-yourselfers!
Read on for more information on the benefits and drawbacks of polycarbonate, as well as some helpful how-to tips for buying, cutting, and installing your panels if you decide this is the right material for your greenhouse!
What are polycarbonate panels?
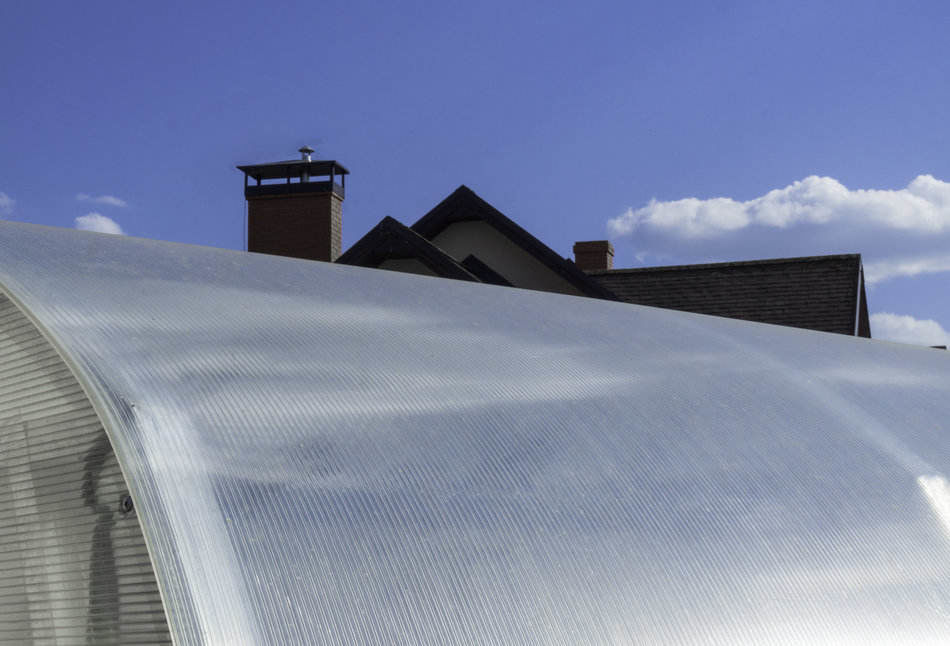
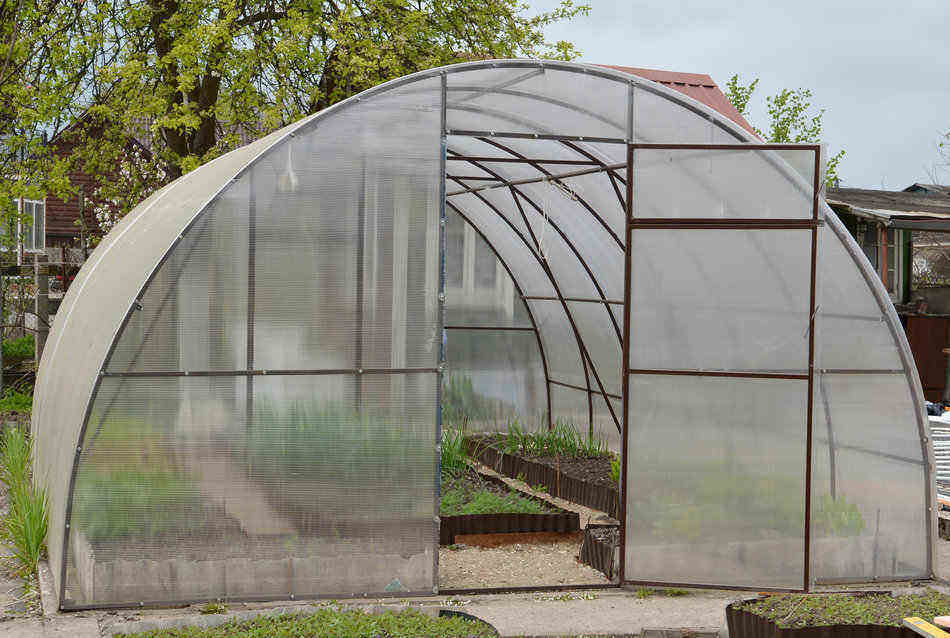
Polycarbonate panels are thermoplastic panels – they are nearly transparent, and they’re rigid but easy to cut and install. Because of this, they’ve been used in a variety of construction projects for years – mostly as roofing in various construction projects – but they have recently been growing in popularity for use as a greenhouse material.
You can easily find these panels at a hardware store, a gardening store, or an online retailer. There are also construction material companies that sell polycarbonate panels and can customize them for you. It might be worth your time to compare prices at various retailers before making your purchase! Or, if there’s a locally-owned hardware or gardening store you usually get your materials from, it might be a nice idea to check and see if they sell polycarbonate panels.
Types of polycarbonate panels
Polycarbonate panels come in three thicknesses: a single layer, a twin-wall layer, and a triple-wall layer. Twin-wall is typically the best type of panel for greenhouse building.
You can use a single layer for greenhouses, but the single layer offers less UV protection and also doesn’t save as much heat as the twin-wall will.
The twin-wall layer is essentially two layers of polycarbonate with corrugations connecting them. The design of the twin-wall allows the panel to filter UV light and retain heat as well as evenly distribute both light and heat.
The triple-wall layer is really just more than you need for a greenhouse. It might actually retain more heat than you need and not provide the same amount of light filtering that the twin-wall panel will.
Benefits of polycarbonate panels
Okay, so why polycarbonate? The easiest way to understand the benefits of polycarbonate is to compare it to a common greenhouse and building material: glass. Glass has historically been the most popular material for greenhouses, and there are definitely upsides and downsides to using it. Polycarbonate has similar qualities to glass but goes above and beyond in areas like durability and ease of installation.
Weight and durability
First, weight. Polycarbonate is very lightweight, especially when compared to glass. This means it’s much easier to transport without fear of anything breaking, and this goes for installation as well. Because of the fragility and weight of glass, many gardeners need to hire someone for the installation process. With polycarbonate, this can truly be a DIY experience (though it never hurts to have some helping hands!).
Often, lightweight means flimsy, but not with this material. Despite being lightweight, polycarbonate is extremely durable. Especially if you live in a place with harsh winters, summertime hailstorms, or anything that might cause damage to structures, polycarbonate is a great option to look into. It can take a beating, and the risk of breakage is very low. It’s more likely than glass to withstand whatever comes your way.
This also means that despite the cost (we’ll touch on this below), polycarbonate is likely to last a very long time with minimal repairs needed. While there are more durable types of glass that can definitely be used for a greenhouse, you’re much more likely to have to do repairs more often if you live in a place with any kind of harsh weather. Polycarbonate is really built to last!
Good for your plants
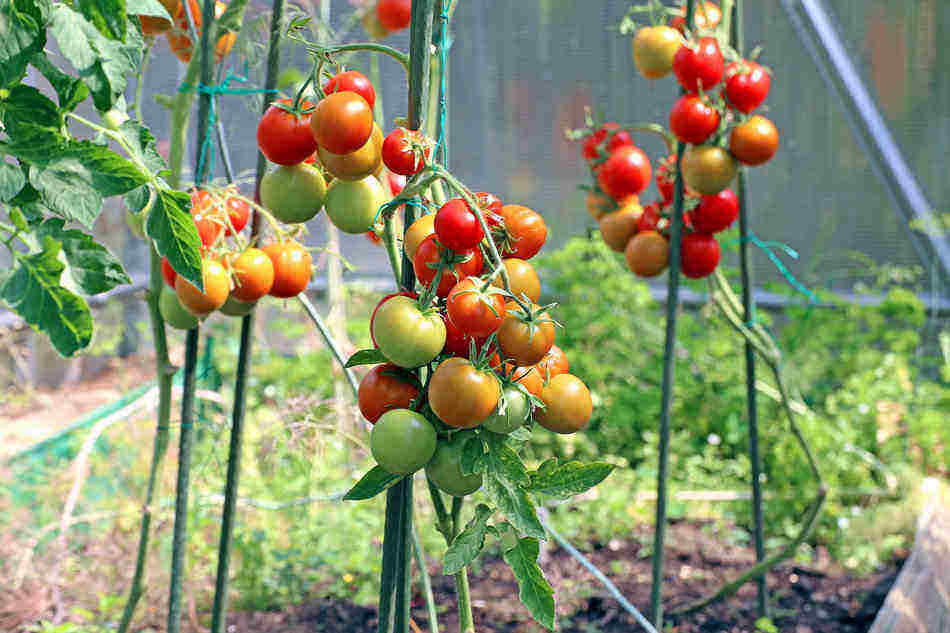
Polycarbonate also provides better insulation for your plants. Overall, plastics retain heat better than glass does, which means that your greenhouse will be warmer for longer without cranking up a heating system. This saves you money, keeps your plants warm and cozy, and is more sustainable because it will use less energy and fewer resources! Especially if you live in a place with harsh and/or long winters, you know how expensive heating can be, but of course, heat is necessary in your greenhouse if you want your plants to thrive. Polycarbonate takes some of that stress off because of its heat retention abilities.
Polycarbonate is also great for UV protection and light diffusion. It naturally filters ultraviolet rays, so your plants are protected from UV light while still getting the amount of light they need to thrive. Plastic also diffuses light more evenly, so no matter where your plants are in the greenhouse, they will receive about the same amount of light. This definitely makes things easier on you because you won’t have to rotate your plants around to make sure they’re getting enough light! You have potential to save money here on lighting systems as well, depending on what you’re growing and how much sunlight you get per day. Any way it’s possible to save money is a win in our book!
Allows for more creativity
Lastly, you’re going to have more flexibility in terms of the size, shape, and potential design of your frame with polycarbonate. Greenhouses made with polycarbonate panels work best with wooden frames, which are more easily customizable in terms of shape and treatment materials. You’ve got a lot more freedom in terms of color for your frame and in overall what you’d want it to look like!
Drawbacks of polycarbonate panels
Sounds pretty great overall, right? Of course, no material is perfect, so you’ll find some possible drawbacks below. It’s definitely helpful to understand the negative aspects of polycarbonate so that you can make an informed decision as you’re planning your greenhouse design.
Monetary and environmental considerations
Cost is the main drawback of polycarbonate panels. They do tend to be more expensive than traditional greenhouse-building materials. However, as they become popular and the production of polycarbonate has been simplified, prices have started to drop. You’d likely still have to pay more for polycarbonate than other materials, so this is something to keep in mind.
Also, because polycarbonate is a plastic, its production process involves possible environmental impacts. It would be hard to find a material that didn’t produce some sort of impact, but plastic processing is shown to be more harmful overall as compared to a material like glass. Because many gardeners are passionate about sustainability and reducing their footprints, we thought it would be good to point this out. One way you can offset a bit of this is by doing some research about local processing plants and local stores. If your panels don’t have to travel far to get to you, and you’re able to spend your money locally, this reduces a bit of the footprint caused by manufacturing.
Aesthetic considerations
Another potential drawback is the look of your greenhouse. Aesthetically, polycarbonate isn’t ugly by any means, but it doesn’t have the more glamorous look of glass. It’s a plastic – there’s no getting around that. If you love the look of glass greenhouses, polycarbonate might not suit your taste. For a construction material, it’s definitely one of the nicer-looking ones, but it’s just not quite as polished-looking as glass is. This is about personal taste and preference, and you definitely want to like the look of your greenhouse, so keep this in mind as you’re considering options.
Lastly, polycarbonate requires specific cleaning materials. Again, this isn’t a huge deal, but unless you’ve used polycarbonate before, you aren’t going to have the cleaning supplies that you need. You can find these materials wherever you buy your panels, or you can get them online – they might be less expensive that way! The cleaning materials should last you a while once you make that initial purchase, so the cost overall shouldn’t make a big dent.
Summary of benefits and drawbacks
| Benefits | Drawbacks |
|
|
Getting started
So you know you want to build a greenhouse, and you’re thinking about using polycarbonate panels. Hopefully the above information has helped you to weight the pros and cons of this material – it’s definitely important to have all the information before making a decision like this. If you decide that polycarbonate panels are for you and you’re ready to dive in, here are some steps for getting started!
Preparing your greenhouse
First, you’ll need to pick a location for your greenhouse. Make sure that the area gets a good amount of sunlight and that the ground is relatively level. This will make building easier and will eventually help make your planting easier as well. It’s definitely a good idea to pick out where you want your greenhouse to go before buying your materials so that you have an idea of how big the structure can be and how much of everything you’ll need.
You’ll also want to consider the uses for your greenhouse when picking out a location – you’ll want to make sure your area is large enough to accommodate a greenhouse that will house everything you’re hoping to grow! Some factors to consider are: whether or not you’re planning to grow in the greenhouse year-round, whether you’re planning to grow produce to sell in larger quantities, and what kinds of things you want to grow and what those plants need in terms of light, soil, and water. The bigger the greenhouse, the more it’s going to cost you, but also the more it’ll give you in return!
Frame Time
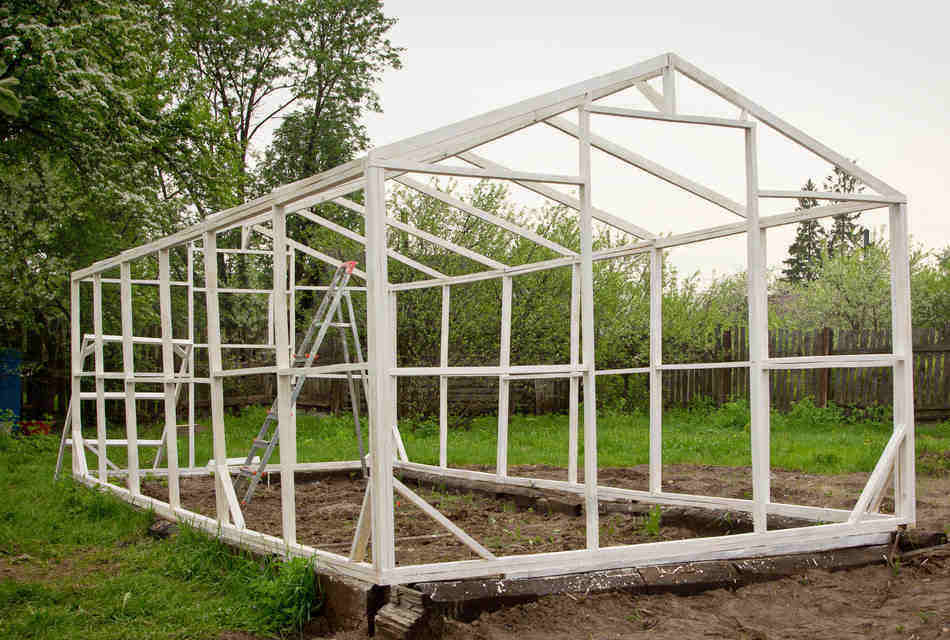
Next, you get to decide on the frame shape and size, and you can buy your pieces for your frame at a hardware store or gardening store. As mentioned above, polycarbonate panels work best with wood frames. This means you have a lot of freedom in terms of the shape and size of your greenhouse! You can easily get the frame pieces cut at the hardware store, or you can take them home and cut them yourself. Totally up to you!
Once you decide on the frame shape and size, you can pick out a color for your frame, or you can buy natural wood for your frame and paint it yourself! If you do choose to paint your own frame, make sure that you treat the wood so that it’s weather resistant. It’s definitely fun to have some more freedom with wooden frames and to get to paint them whatever color you want, but keep in mind that if painting isn’t your thing, this isn’t a necessary step! You can buy treated wood for your frame and skip the frame-decorating party.
When you have your frame pieces, you can install your frame. This can definitely be accomplished alone, but it never hurts to have some helping hands to hold your pieces together as you secure them. Make sure your frame is sturdy and that it’s in the shape you want before moving on to your panels.
Prepare for panels
Once your frame is good to go, you’re ready to figure out how many panels you need. Standard panels that will be regularly available at gardening and hardware stores measure 48 x 72 inches, but some stores may have a variety of sizes. If you need to customize some panel sizes, you can definitely do that through the store as well, or you can easily bring them home as is to cut them yourself.
Before you go to the store for your panels, it would be good to check and make sure you have all the tools you’ll need. You’ll want a circular saw, a utility knife or gardening scissors, a drill, a ruler, and sealant. There are a few more things you should pick up while you’re buying your panels, which we’ll get into!
It should be said that if you only want to make one trip to the store, you can of course calculate how many panels you’ll need based on the design you’ve come up with for your frame. Then you can get your frame and your panels in the same trip! The only reason we separated these steps above is because often, people’s plans change slightly as they’re building their frames, and new ideas often strike us. If this happens before you buy your panels, you’ll be able to get exactly the amount you need based on what your frame looks like.
Buying your panels
When you go to the store to get your panels, it’ll be helpful to find someone who can talk through the materials and the process with you. If you can find an employee who is knowledgeable about construction using polycarbonate panels, about greenhouses, or both, that’s ideal! If not, no need to worry. You’ll be able to scope things out.
When you’re buying your panels, you’ll also need a fastening system so you can connect the panels. A fastening system consists of joints (which are usually either foam strips or plastic or metal caps) that connect the panels to each other and then screws and washers that you’ll drill holes for. These will be used to hold the panels together and also to connect the panels to the frame.
Panels have specific fastening systems that are designed for them, so make sure you’re getting the right ones. Either the panels will come with these systems, or the packaging will specify which system is needed. The fastening systems should be right nearby in the store, so they should be easy to find!
Another helpful note is that each panel will come with a protective sheet over it – similar to the plastic covering that comes on a new phone or any kind of electronic. Your sheets will be best protected, especially as you’re transporting them, if you leave this film on until you’ve installed the panel. If you don’t take the plastic covering off, it’s not a big deal, but it may become stuck to the panel as the sun warms it, so it’s best to just take this off right after you install the panels.
Preparing your panels for installation
Okay, you’ve made it back from the store and you’ve got everything you need! It’s time to cut your panels and build your greenhouse.
Like we’ve said before, polycarbonate panels are easy to install yourself because of how lightweight they are. That being said, for big projects like this, it’s always helpful to have some extra hands and encouragement! If you can get some friends or family members involved in the building process, it’ll definitely be easier, it’ll get done more quickly, and it’ll be more fun. Promising a food-related reward never hurts!
Before cutting your panels, it’s a good idea to test them out with your frame and get a good idea of how the panels will fit together and if/where you’ll need to cut some of them. This will just make it less likely that you’ll cut panels too small.
Cutting your panels
As we said above, you’ll likely need to cut some of your panels in order to fit them into your frame. If this is the case, it’s time for your circular saw, your ruler, and your utility knife or gardening scissors. Extra hands will be particularly helpful at this stage because friends or family can hold the panels still while you cut. This will help prevent the panels from vibrating and will allow you to cut evenly.
For your larger panels, your circular saw will be ideal. Slowly and carefully run the saw through the panel. For your smaller panels, you can opt for the saw or use a utility knife or gardening scissors and a ruler instead.
This is really up to you – whichever tools you feel more comfortable with are the ones that’ll be the easiest for you to use. If you’ve never used a circular saw, it might be better for you to use the utility knife or scissors for all your cuts. If you’re really comfortable with the saw, you can forgo the knife or scissors! The saw makes the cutting process quicker, but if you aren’t comfortable using it, slow and steady with tools you’re more familiar with wins the race.
Drill your panels
You’ll also want to drill the holes in your panels prior to installation. The panels will come with instructions for this, but we’ll give you some tips. The holes should each be slightly larger than the screws themselves to allow for thermal expansion. Also, each hole should be at least ½ inch from the edge of the panel. The location of the holes will really depend on the size and shape of your greenhouse, so following the instructions that come with the panels will be key here. Using washers will also help make your greenhouse sturdier and will just keep everything in place.
Installing your polycarbonate panels
It’s finally time for installation! Honestly, the actual installation is probably the easiest part, now that you’ve gotten all the materials and cut them to fit your greenhouse frame.
When you hold your panels up to your greenhouse to begin the process, make sure that the label side of the panel is facing out. This side is UV-protected, so it’s important that it’s facing out toward the sun in order to absorb sunlight while protecting plants from harmful UV light. Also, the corrugation should be vertical rather than horizontal when you place the panel for installation.
You’ll want to start with the roof panels and work down from there. When you lay the panel in place, there should be at least a 5-degree slope, which will allow rainwater to run off the roof, will take some pressure off the roof if you experience heavy snowfall, and will hopefully reduce potential wind and hail damage. As long as you have at least this much slope, the angle of the roof is really up to you!
You’re now ready to install your first panel, using your drill or screwdriver, screws, and washers to attach it. Make sure that the roof panel is attached to all of the support beams of your frame. You want your screws to be secure but not extremely tight, to again allow for thermal expansion.
From there, attach your fastening system to the panel, and then your next panel should click right in. Kind of like a giant puzzle! Repeat these steps until each panel has been installed and fastened.
If you have any gaps between your panels or between the panels and the frame, there’s no need to worry! After all, this is a DIY project, and we’re only human. This is where the sealant will come in handy—you can use it to fill any gaps you find.
Related Questions
How thick should polycarbonate be for a greenhouse?
The actual thickness or width of the panel can vary, but of the three types of polycarbonate (single-, double-, and triple-wall), the double-wall is going to be best for the greenhouse. The single-wall won’t retain as much heat, and the triple-wall is just more than you need – it may end up retaining too much heat and also doesn’t filter light quite as well as double-wall does. Think of the double-wall as the Goldilocks of polycarbonate when it comes to greenhouses!
How do you fix polycarbonate panels?
Although polycarbonate is known for its durability and is unlikely to need repairs, things do happen, so it’s good to be prepared if you need to fix a panel. Your roofing panels are most likely to need repairs since they take the hardest impact from weather. You can use epoxy or silicon to fill any cracks or holes. If you have a larger hole and you have some extra polycarbonate, you can also cut a piece that is slightly smaller than the hole and then use that plus some silicon or epoxy (or really any kind of waterproof sealant) to patch the hole.
What is the best polycarbonate for a greenhouse?
Other than the recommendation that the polycarbonate is double-wall, there really is no best brand specifically for greenhouses. This is really up to you in terms of personal preference and how much you want to spend. Some brands will be more expensive but offer better warranties, or they may have different size varieties that suit you better. It’s up to you, but any type of double-wall polycarbonate will work really well for your greenhouse!
Best of luck in your greenhouse building endeavors! We hope this answers your questions about polycarbonate and that you’re interested in trying this material out.

