A greenhouse can be the key to taking your gardening to the next level. But where to start? At first, it can seem overwhelming—heating, cooling, ventilation, & on and on. Eesh… But it’s actually easier to get started than you might think.
A greenhouse is a worthwhile venture as it allows gardeners to control conditions for their plants, beating the limitations of their climate. Greenhouses range from small, simple structures that require little work and maintenance, to larger structures with various systems in place to maximize production. It’s all about what you need!
Relax. Sit back. Let’s work our way through some of the information on getting started with greenhouses. There’s lots of variety out there–from adorable little window greenhouses, to elegant wood and glass structures–but we’ll try to keep it organized and highlight the “big ideas” of greenhouse growing.
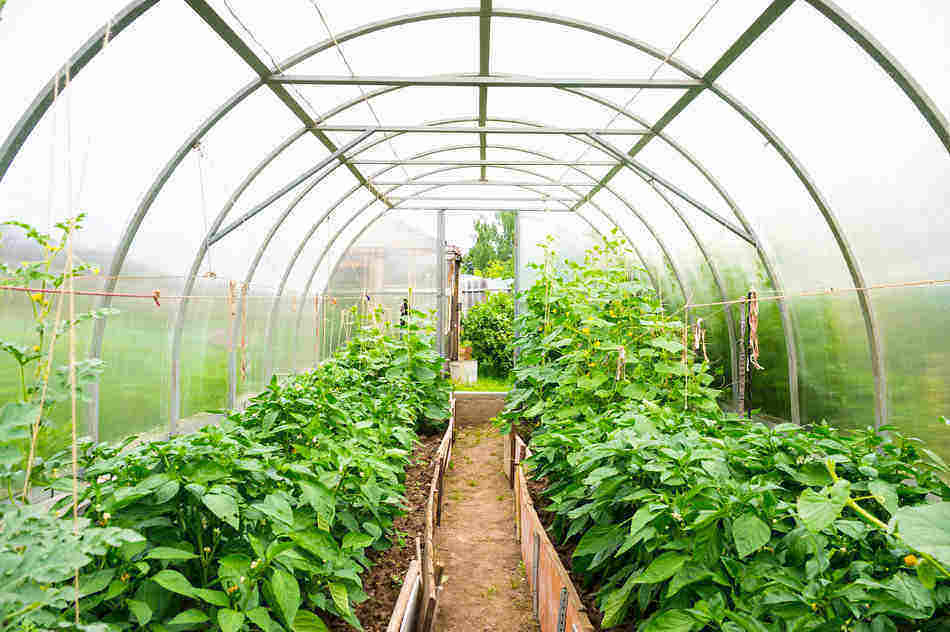
Greenhouse basics
You’re likely interested in greenhouses because you’ve become aware of the limitations of your climate for what you want to grow. As intimidating as it might be to venture into the “greenhouse level” of gardening, here you’re, looking into it.
Greenhouses are worth the learning curve.
Unlike growing plants outside, greenhouses allow gardeners to more carefully adjust and control the environment that will allow their plants to thrive. No matter what the weather, temperature can be adjusted to the needs of your garden with various heating and cooling systems.
With a greenhouse, you can maximize your garden by starting plants early, and then transplanting them. You can select plants that, without a greenhouse, would not be able to grow in your climate. In some cases, you can beat the limits of climate altogether and grow (almost) whatever you want, year-round.
As with most things in the realm of gardening, as many gizmos and gadgets as there are, it really can be simplified into what plants need. Really, what plants need is simple enough for elementary students to understand and memorize.
Light, water, air, nutrients.
A greenhouse allows you to provide for your plants’ needs exactly to their liking. A greenhouse also means you need to think about these needs, ensuring you’re not neglecting any of them. You need to manage your plants’ inputs of light, water, air and nutrients.
Greenhouse setup
Greenhouses range from simple, DIY structures that cost less than a hundred dollars, to more complex structures that run into the thousands of dollars.
Choosing a type of greenhouse
As you consider what size of greenhouse you need, remember that it’s a long-term investment, and that it’s really a step toward expanding your existing gardens. Many gardeners build a greenhouse and, a few seasons later, wish they had a bigger one!
Give yourself more room than you think you’ll originally need.
Greenhouses can be divided into two general categories:
Attached Greenhouses
- These types of greenhouses are attached to an already-existing building. You don’t have to build all four walls, and, with the one weight-bearing wall being more sturdy, the other three walls can be lighter. This helps conserve money and space. Often, these types of greenhouses are attached to a house or garage.
- Another pro for an attached greenhouse: by its nature, it’s in close proximity to electricity, heat and water. Depending on the building you attach it to, this type of greenhouse is accessible and easy to check up on in the course of daily life.
- Some downsides to an attached greenhouse: limited space, limited light (as one of the walls is not actually a greenhouse wall), and limited control of ventilation and temperature.
- There are different kinds of attached greenhouses:
- Lean-to: This type of greenhouse is built against a building, with the roof looking as if it’s “leaning” against it. With the building acting as one side, this greenhouse can be as long as the building itself, but its width is limited to 7-12 feet.
- Attached even-span: This type of greenhouse looks similar to a freestanding greenhouse, except that it’s attached to another building at one gable end. This allows for more flexibility and space than a lean-to, but it’ll also cost more to heat the bigger you go.
- Attached window-mounted: These are pretty neat! You remove a regular window from your house, and replace it with a (usually prefabricated) window greenhouse. These are small, easy to access (just reach in!) and are low-cost in terms of temperature control.
Freestanding Greenhouses
- A freestanding greenhouse is–you guessed it, freestanding. It stands on its own, not attached to any existing building.
- With freestanding greenhouses provide you with a lot of freedom. You can have it as big as you want, in the location you want, and in the shape that you want, without having to consider another building. Another positive to freestanding is that you get more sunlight, as all 4 walls are greenhouse walls.
- The downsides to freestanding greenhouses are that they require more space, they can be more expensive to build as you’re not piggybacking onto an existing structure, and they are more expensive to heat and cool.
- A downside, or an upside, depending on how you look at it, is that freestanding greenhouses are–obviously–not attached to your home. Unlike a window-mounted greenhouse, you may actually need to put shoes and a coat on to go check up on your plants. On the flip side, you can create a cherished space in the form of your greenhouse, allowing its separateness from daily life to make it a sanctuary.
- Freestanding greenhouses come in many different shapes, such as:
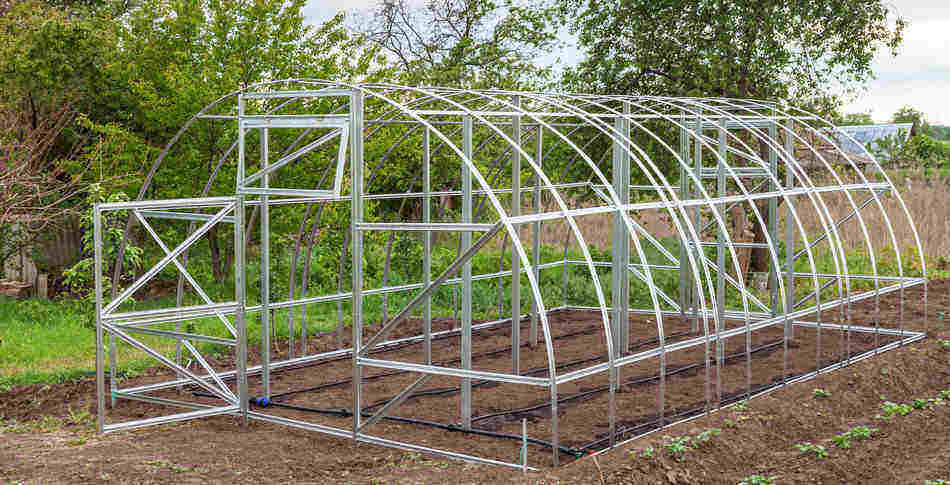
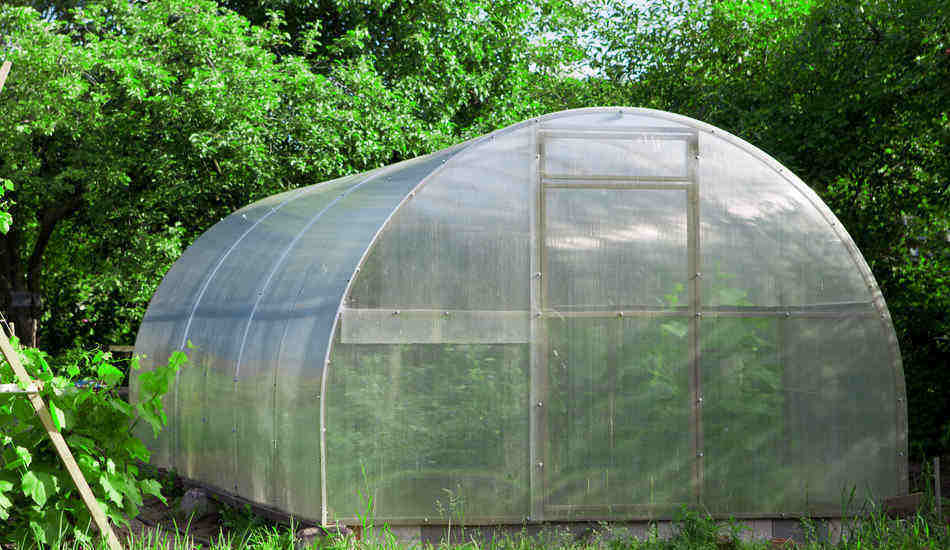
- Quonset (like a tunnel shape)
- Gothic
- A-frame
- Gable roof/post and rafter
- Dome
Materials
When you build a greenhouse, there are generally two parts to consider: the frame and the cover.
Surprise, surprise. There are options for both!
- A frame may be wood, steel or aluminum. Plastic pipe materials are generally not strong enough for wind and snow, but if you just want a temporary season-extender, it may be all you need.
- Greenhouse covers, also called “glazing”, include options of glass, fibreglass, polycarbonate or plastic sheeting.
- A glass cover would be the most expensive initially, but can make for a long-lasting, attractive option. An interesting DIY option that I must mention here involves using old glass windows to save money and create a very unique space for your plants. (Search that on Google images!) I have two giant old windows in my garage, and I’m really thinking of going this route for my next garden expansion.
- Plastic sheeting as a cover is the most affordable option. It should be greenhouse-quality, thick sheeting; a double layer of plastic sheeting can significantly reduce your heating costs. Plastic sheeting is short-term, though, lasting only about 1-3 years.
- A middle ground is fibreglass, and it’s available in different quality grades, affecting the lifespan.
- Polycarbonate is stronger than fibreglass, is less expensive than glass, and transmits light and retains heat well.
Location
Location, location, location!
Where’s the best spot for your greenhouse?
First, it has to be somewhere you’ll actually go. You might have the perfect place, but if it’s way at the back of your property and it’ll just be neglected amongst overgrown weeds, you’ll just be wasting your money. Put it somewhere accessible, so that you can nurture those plants regularly.
A top priority when selecting a greenhouse location is sunlight. You want a spot with the maximum exposure to direct sun. Ideally, this will mean 6 hours of sunlight a day even during the winter months. To maximize those rays, situate your greenhouse so that one of the longer walls will face south.
When it comes to winter sun, the best spots to consider are in the following order:
- South or southeast side–this is your best bet for the most sun!
- East side–this is second best.
- Southwest and west
- North side–this is the worst spot.
Consider your greenhouse throughout the seasons. In the summer, your greenhouse plants may need a break from the sun. Deciduous trees provide an excellent solution, as they provide shade cover in the summer, but lose their leaves for the winter.
Finally, for building purposes, look at the ground. Find a level spot with good drainage.
Greenhouse accessories
Okay, you’ve decided what kind of greenhouse you want and you have the skeleton done. (Or, at least, you can imagine what it’ll look like.)
Some other things you should consider:
- Water source. Depending on the size of the greenhouse, you should have valves leading to outlets that can supply water at room temperature all year long. (If you’re just doing a small backyard greenhouse, this may not be needed.)
- Benches at a comfortable working height and width. If benches are made of wood, wood needs to be treated with preservative so that it doesn’t rot.
- Another option, instead of benches filled with potted plants, is to use raised beds inside your greenhouse. These can require less watering and save space. You can buy pre-fabricated raised beds, or build your own.
- Automatic controls can serve a multitude of functions. As we discuss heating, humidity, ventilation, air circulation, and watering, I’ll mentioned the different automatic controls related to each area.
- A thermostat. Even if you plan to sidestep automatic gadgets, deciding that you don’t mind cranking things by hand, that’s all the more reason for you to have a thermostat. You’ll need to monitor the greenhouse temperature so you can cool or heat it as needed.
- Fans and vents. These are necessary for air circulation and ventilation. More on those later.
After you’ve got the basics sorted, there are a host of other things you can add to a greenhouse if you want. A tool rack, a potting bench, various containers, a mist system, shelves, grow lights … It all depends on your goals, your budget and your needs.
Light
Sunlight is one of the key needs of every plant. It’s sunlight that powers the process of photosynthesis, by which plants create their own sugars for growth.
Your plants’ sunlight needs vary according to your climate and region. Likely, they will vary throughout the year. Your job as gardener is to keep plants in their happy place by avoiding two problems:
- Too much sun. Yup, there’s such a thing as too much of a good thing. In this instance, plants are overheating and possibly even burning. To prevent this problem, you can use shade cloth to adjust the amount of sun that is filtering down to your plants. You can select the shade cloth density you need–how much sun the shade cloth blocks–according to the types of plants you’re growing.
- Next: Too little sun. In northern regions, some winter months just don’t provide enough sunlight for plants to thrive. You can adjust which plants you grow in the winter, aiming only for those that can make do with fewer hours of sunshine, or you can supplement the sun with grow lights to give your greenhouse plants the boost they need.
The same greenhouse can face both problems–too much or too little sun–at different times of the year. If this is the case, putting your greenhouse near deciduous trees can “kill two birds with one stone”, so to speak.
In the summer, when your plants need a bit of shade, the trees’ leaves will provide them a break from the hot sun. In the winter, when your plants are starved for every ray they can get, the trees’ leaves will have fallen off, allowing maximum sunlight to filter through.
Heating systems
For most plants, the minimum greenhouse temperature is 40 degrees F, and the maximum is 85 degrees F (or about 4 Celsius and 29 Celsius for my fellow Canadians). The minimum of 40 degrees is really just providing frost protection.
Minimum temperature and insulation
If you live in a cold climate, you may need to install a heating system in your greenhouse to keep your plants in that happy heat range.
Besides knowing the ideal temperatures for your plants, you also need to think about the lowest outdoor temperature that your heating system will have to battle. The space between your ideal temperature and the actual temperature will help you decide which type of system is best for you.
Another thing to keep in mind is that, within a greenhouse, there will always be cooler or warmer areas based on sun, soil, ventilation, cracks, or distance from the heat source. A University of Georgia article on “Hobby Greenhouses” calls these “microclimates”. Even within the controlled confines of your structure, you’ll need to plan the location of your plants according to these little zones of varying temperature.
Heating system needs are also going to be affected by how well your greenhouse insulates, based on what it’s made of, and of course the size of your greenhouse. Again, if and when you purchase a heating system, think about future expansion. You don’t want to spend all this time and money, and then be kicking yourself two seasons later, wishing you’d upgraded to the next level.
Even if your greenhouse stays nice and warm during the day, you’ll need to stabilize the temperature as it drops at night. Choosing an insulating material to build with gives you a big head start in this area. You can also store water in barrels, as it absorbs and releases more heat from the day than soil does, or add some natural insulators such as straw or mulch. Rocks can also be used to absorb and release heat.
Greenhouse heating cost considerations
For most people, the main factor when choosing their heating option is economics. Various systems, whether using electricity, steam, wood, or gas, all come with different price tags.
- Space heaters: These are low-cost, and, with a fan to move the air around, one or two basic space heaters will do the trick for a small greenhouse.
- Forced-air heater: A forced-air furnace with a plastic tube system running the length of the greenhouse to distribute the heat ensures that the entire structure stays warm. Temperature can be controlled by a thermostat.
- Hot-water or steam heater: A steam system with automatic circulation can keep a greenhouse warm and humid. Depending on your area, coal or natural gas may be an affordable route, and this type of fuel works well with a hot water or steam system. Hot water used for bench heating can keep specific zones of your greenhouse warm.
- Electric heat: This is a costly option, so it’s typically used in small greenhouses. Electric resistance heaters can be used as space heaters or in a forced system. Overhead infrared heating provides adequate warmth to a specific area of plants.
When considering different heat options, remember to be safe! All greenhouse heaters should be ventilated and carbon monoxide levels should be monitored. More on that in the next section. Another note on safety is to ensure that, whatever heat system you use, you have an automatic shut-off.
Ventilation and air circulation
Ventilation is important for both humans and plants. Ventilation refers to the exchange of air from inside and outside the greenhouse. Fresh air supply and circulation ensure that your plants are getting a steady supply of carbon dioxide, while also ensuring that carbon monoxide levels don’t climb too high. You–and your plants–need to breathe!
When the weather is warm, ventilation also allows you to control temperature in the form of cooling. You don’t want to capture so much sun that your plants get too hot. Even in the winter, you’d be surprised how warm things can get on a sunny afternoon.
When it comes to ventilation, you can keep things simple with hand-operated vents in the roof or upper walls of the greenhouse. You’ll have to open and close these throughout the day, monitoring the temperature in the greenhouse. A more complex, but obviously a preferable option, is to have an automatic ventilation system that will kick in based on the thermostat. These electric vents respond to the temperature and automatically open and close.
Polyethylene ducts hanging along the inner roof of the greenhouse can be used in combination with fans to distribute fresh air evenly.
No matter the size of the greenhouse, fans are needed to ensure air movement. In the winter, if you’re heating your greenhouse, fans are needed to ensure that the warm air is being spread around and not just rising to the top of the greenhouse. For a small greenhouse, two fans in opposite diagonal corners will meet the goal of circular air movement. These fans should run whenever you’re heating your greenhouse, but can be turned off in the summer.
If you’re using a forced-air heating system, this fan can also do double-duty as providing air circulation. In this case, make sure the fans will not shut off based on temperature; even when the heat is off, the fans should be able to continuously run.
Humidity
When I think of going into a large greenhouse, I can instantly recall the different sensations that come with it. The smell of soil, the sight of crowded potted plants. But the very first sensation I think of is the one that envelopes me the moment I step inside–the feeling of that warm, moist air.
If you live in a hot, dry climate, you may need to consider adding humidity to your greenhouse. An evaporative cooler system, or a fan and pad system, both cools your greenhouse and increases the moisture in the air. Basically, it’s a fan that sucks air out of the greenhouse and replaces it with outside air.
The outside air passes through wet pads, cooling it down and increasing its humidity. Watering plants by misting is another way to up the humidity levels. If needed, humidistats can regulate humidity by automatically turning on humidifiers when needed.
Too much humidity
On the flip side, too much humidity in a greenhouse poses a threat to your plants. If plant leaves become too wet, diseases and fungal infections can break out. As this moisture evaporates to the roof of the greenhouse, condenses, and drips down again, other plants can become infected.
To reduce humidity, try to stabilize the temperature of the greenhouse. If your greenhouse is swinging from hot to cold, these rapid temperature changes are prime conditions to add a lot of moisture to plants. Why? Warm air holds more moisture than cool air. If that warm greenhouse air cools rapidly at night, for example, all that moisture it has been holding becomes a wet coating on plant leaves as the air cools.
An essential piece for reducing humidity is proper air ventilation and circulation. Additionally, good drainage and proper watering help keep humidity levels at a healthy level.
Whether you’re reducing or increasing humidity, a loose, water-absorbent floor surface helps retain or absorb moisture as needed.
Watering & irrigation
Water–one of those simple plant needs that we all know about. In a greenhouse, your plants rely on you for their water, as they are sheltered from any rain.
For most greenhouse plants, hand watering is perfectly adequate.
However, if you’re unable to water your plants or want to make sure they’re getting just the right amount, there are different systems to help automate the watering process.
Timers and evaporation sensors keep your plants happily watered no matter where you’re. Automated watering systems can water your plants in beds, benches or pots. Misting sprays can provide added humidity and gentle watering for seedlings.
Whatever watering system you choose–even if it’s just you carrying a watering can–remember, of course, that different plants, soil and containers require different amounts of water.
Nutrients & fertilizing
Okay, so we’ve covered most of what a plant needs:
- Air
- Water
- Sunlight
Now we’re looking at nutrients.
Managing your plants’ nutrients in a greenhouse is really the same idea as managing your plants’ nutrients in containers or in an outdoor garden.
You can test your soil to monitor the balance of nutrients, as well as the acidity level. Knowing what type of soil you’re working with–sandy, loam, clay, silt, peat, or chalk–will help you adjust your soil according to your plants’ needs. Purchased soil–whether for greenhouse garden beds or containers–will mean that you know exactly what you’re working with.
Adding organic matter to soil is an important way to ensure your plants are growing in nutrient-rich soil that can retain moisture. Organic matter is any matter that derives from plant or animal materials. Humus is the final product in the cycle of decomposition; it’s the banana peels, egg shells and manure that have been broken down into rich, dark soil.
If your soil needs a boost of fertilizer, which it surely will at some point, there are a variety of organic and non-organic fertilizers to consider. Generally, organic fertilizer release nutrients more slowly to plants, while non-organic fertilizers can deliver what they need more quickly. Organic fertilizers help your plants while also improving the quality of your soil. Non-organic fertilizers are often more potent; this is a good thing, but you need to be careful not to apply too much of a certain nutrient.
Choosing plants
A major use of greenhouses is to help annual flowers and vegetables get a head start on the growing season. To conserve space, seeds are sown in flats, ideally in soil that is prepared specifically for seedlings.
Think about what kind of plants you’d like, specifically those that require a longer growing season than your climate allows. Before planting any seeds, however, check to make sure that these plants do well with being transplanted. Some plants, such as cilantro, don’t transplant well and, if started early, should be planted in something large enough that can hold the full-grown plant.
Another use for greenhouses is to force early flowering of spring flowering bulbs. Tulips, narcissus, hyancinth, and crocus are just a few of these flowers that can be tricked into an early bloom. To do this, bulbs are planted in pots in the fall, then the pots are buried under sand and/or straw. After about six weeks, the pots can be brought into a greenhouse. The exact number of weeks before flowering will depend on the specific plant.
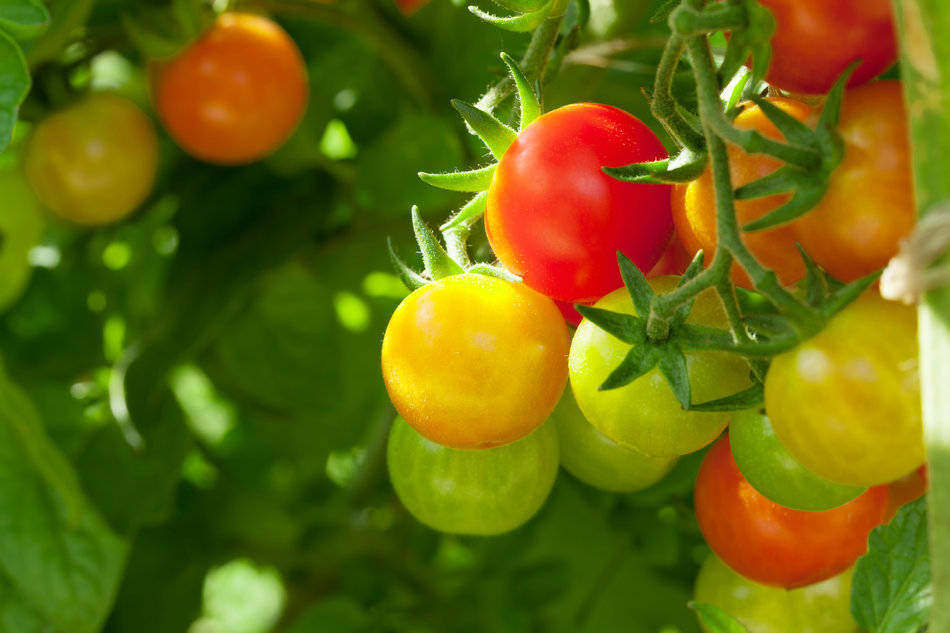
In some cases, greenhouses are used to bring plants from seed to harvest. Tomatoes, for example, can be grown in greenhouses year-round to serve local markets, as well as flowers like chrysanthemums and poinsettias.
Choosing greenhouse plants for cool climates
At this moment, you might be feeling yourself swell with a feeling of power. I live in northern Ontario, so the idea that I can coax flowers to bloom in the barrenness of winter, or eat fresh-grown tomatoes in January, makes me want to pump my fist in victory. I can beat winter!
Well, not entirely.
You’re still limited to your climate. Some plants will thrive in your region; others won’t fare as well. Even in a greenhouse.
Unless you’re ready to fork out a lot of money to add artificial light and crank the heat all year long, you will likely have to accept some limits.
If you live in a cool climate, you will need to adjust your vision. Spring through fall, go for it–tomatoes, peppers, cucumbers, whatever. In the winter months, though, there are just not enough hours of sunlight to support these plants (unless, as mentioned, you’re willing to pay the price to create your own tropical paradise 24/7). In the winter, it’s best to look at cool-weather crops for your greenhouse, such as greens, lettuces, and herbs.
So … maybe not juicy tomatoes in January. At least not where I’m. Fresh green kale in January? Yup, that’s more within my reach.
Avoiding pests & diseases
Pests and diseases are an issue for all gardeners. In a greenhouse, however, with many plants in close quarters and other natural elements missing (for example, the creature that would normally eat the creature that’s eating your plants), you can be particularly vulnerable.
First, make sure the greenhouse and gardening tools are kept clean. Part of keeping your plants and greenhouse clean is ensuring good ventilation, air circulation, and proper humidity levels. As mentioned before, stale air or high moisture can encourage fungal infections or diseases. Steam can be used to sterilize soils if needed; commercial mixtures are already sterilized and ready to use.
Another important measure to prevent pests and diseases is to avoid overcrowding. While you might be tempted to squeeze in as many plants as you can into your greenhouse, to get more bang for your buck, you might actually be diminishing your productivity. First, many plants don’t thrive if they’re crowded. Secondly, pests and diseases can easily pass between plants that are touching each other.
Before bringing new plants into your greenhouse, check them over carefully for pests or disease. If a plant is infested with a pest, or is diseased, remove it before you have an epidemic on your hands. Spraying plants with insecticide or deterrents–natural or chemical–can also help prevent issues.
If certain bugs have a become a big problem for you, you may need to bring in back-up: the good bugs. Insects like ladybugs, green lacewings and whitefly parasites can help control populations of pests.
Think about what pests exist in your area, and how that will impact your greenhouse. For example, if moles or voles are a big issue for your existing garden, consider putting chicken wire at the base of raised beds in your greenhouse to act as a barrier to persistent burrowers.
Planning for the future
Do yourself a favor, and keep records of your victories and losses in the greenhouse.
This is a good rule of thumb for gardening in general. Memory gets awfully fuzzy in between growing seasons. In a greenhouse, however, keeping records is especially important. Every square foot of that greenhouse has cost you not just in time, but also in materials and upkeep. If you’ve gotten into heating and cooling systems, automatic watering systems, and advanced ventilation, it’s no small price tag.
Keeping track of what worked well and what didn’t, when and where in the greenhouse, will help you maximize your investment year after year.
Related Questions:
What can I grow in a small, basic greenhouse?
A lot. The answer to this question really depends on what you want to grow, your climate, and the time of year. For a beginner greenhouse, choose flowers and vegetables that are easy to grow. Depending on your climate and the time of year, decide between cool-weather plants that can thrive with less sunlight, and warm-weather plants that demand more hours of sun. In a small space, resist the temptation to overcrowd your plants. Starting seedlings for spring transplant might be a better use of limited space.
What is the best floor for a greenhouse?
A greenhouse made of rigid materials, such as glass or fiberglass, should have a permanent foundation. For most, that would be a poured concrete foundation. Permanent flooring, however, is not a great idea as it’ll stay wet in a greenhouse environment. If you have a greenhouse with a foundation, several inches of gravel as “flooring” on top of the foundation will allow for water drainage. If you have a greenhouse that doesn’t require a permanent foundation, the ground itself is all the flooring you need.
How do I move seedlings out of a greenhouse?
If you’ve used your greenhouse to start seeds early, when you can move them depends on your plant. Before moving them, have the patience to wait until it’s warm enough for them to thrive, and take the time to harden them off first.
Generally, plants can be moved when they have two or three pairs of adults leaves; some can be moved earlier than that, while others need to wait longer. When moving your plants, you first need to “harden them off” as a way of helping them to adjust from the greenhouse cocoon to the natural elements. Put them outside, in their pot or tray, for increasing lengths of time before fully transplanting them. The right outdoor/soil temperature depends on the type of plant you’re transplanting. If the weather is unpredictable, and spring is taking longer than expected, you may need to move the plants to a larger pot while you wait for the right conditions for transplanting.

